Starting work on the back
|
Sign
Guestbook
View
Guestbook |
   |
|
Create the spine
|
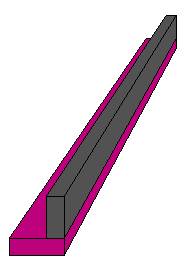
| Get an uncut 2x6 and an uncut 2x4. Cut both to 6" less than the
height of an A-frame. Attach the 2" side of the 2x4 to the 6" side of the 2x6 to
create an L-beam. Use your small drill bit and long sheet-rock screws spaced every
8". |
 |
|
| Using a measuring tape, find the center of the back of the work-surface.
Make a mark with a pencil on the top of the work-surface. |
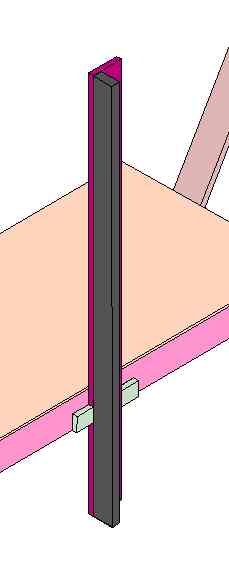
| C-clamp the 2x6 so that it is vertical in the center of the back of the
bench and so that the bottom of the 2x6 is 6 inches off of the floor. Drill a 9/16ths inch
hole so it centers left-right in the new 2x6 and up-down on the back of the work-surface.
Insert a bolt and hand tighten the nut. Use your level or square and make sure the 2x6 is
real close to vertical. Tighten the nut with a wrench. Don't hurt the wood in the process.
|
Add chocks to back of work-surface to bracket the spine
|
| Cut a pair of 3" 2x4 pieces. C-clamp them on the sides of the 2x6 near the bottom
of the back of the bench. Attach each with a pair of long sheet-rock screws. |
 |
|
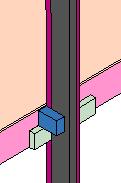
| Clamp a 3" x 2x4 chock to the left side of the spine tight against the (green)
chock that is mounted to the bench back. This new chock aids assembly. Attach using a pair
of long sheet-rock screws. Remove the clamp. |
 |
|
Place left diagonal
|
| The diagonals are what make the side to side rigidity of the bench. They
also control the shape of the sides of the bench. Make sure the sides of the bench are
vertical using a level, and clamp both ends of both diagonals, before drilling
holes!. |
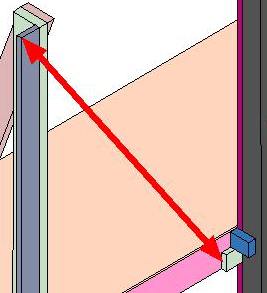 |
First, measure from the top left of the left chock that you just put on, to the top of
the left rear leg. |
|
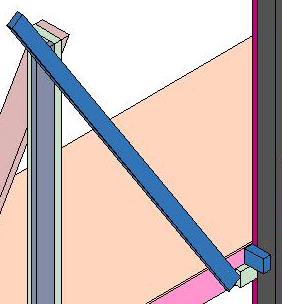
| Cut a 2x4 to about 6" longer than this length. Place the 2x4 such
that it is touching the left edge of the left chock and extending over the upper left edge
of the left leg as shown: |
 |
|
| 1. Before proceeding, read through step 5 of this procedure taking note
of where the upper left cut will be made. |
| 2. Clamp the lower right end, also leaving room for a nut and bold to be
placed. Make sure that the lower right end of the diagonal is pressed up against the chock
as shown. This will be critical for ease of assembly later on. |
| 3. Clamp the upper left end, leaving room for a nut and bolt to be placed
through the diagonal and left leg piece (gray in this diagram). Check to make sure that
the left leg is precisely vertical. |
| 4. Drill a 9/16ths hole through the diagonal and leg, and through the
diagonal and back of bench. Insert a bolt into both holes. Remove the clamps. The bench
should be pretty rigid. |
| 5. On the upper left end of the diagonal, mark the 2x4 where
it extends over the top of the leg. Remove the 2x4. Mark across the 2x4 square so that the
2x4 does not overlap the top or left side of the left leg. Cut off the excess material. |
 |
|
| 6. Replace the 2x4 and insert the bolts. Finger tighten a nut on each
bolt. The bench should be pretty rigid. If the bench rocks, tighten the nuts with a
driver. Do not hurt the wood. |
 |
Now place two chocks as shown. C-clamp them, then mount with a pair of long sheet-rock
screws each. The chocks are to be located at the lower right end of the diagonal, and at
upper left end of the diagonal. Their purpose is to aid in assembly. Make sure they are
tight against the diagonal before tightening the C-clamp. |
 |
|
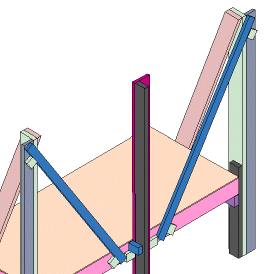
Repeat the Left Diagonal Process,
for the Right Diagonal |
| Note: Chocks used for positioning of the other shelves, located on the
bench-sides, are not shown. |
|
|
|